Relocating the battery
Like most cars, the Corolla coupé had its battery mounted in the front of the car, in the engine compartment.
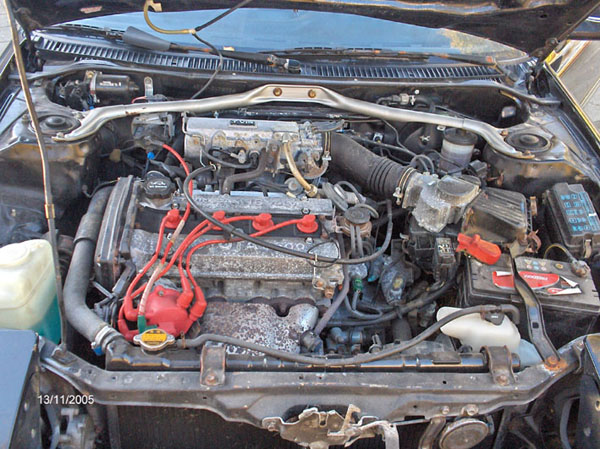
But I had already planned to relocate the battery to the rear of the car. The placement of the battery in the front works just fine, but as you can see in the picture above, it's pretty full in there.
So relocating it has a few advantages. The most important is that it frees up quite a bit of room up front wich I can certainly use later on. I also cleans things up a bit under the bonnet. A less important reason, but a nice side affect is a little bit better weight distribution in a already front heavy car.
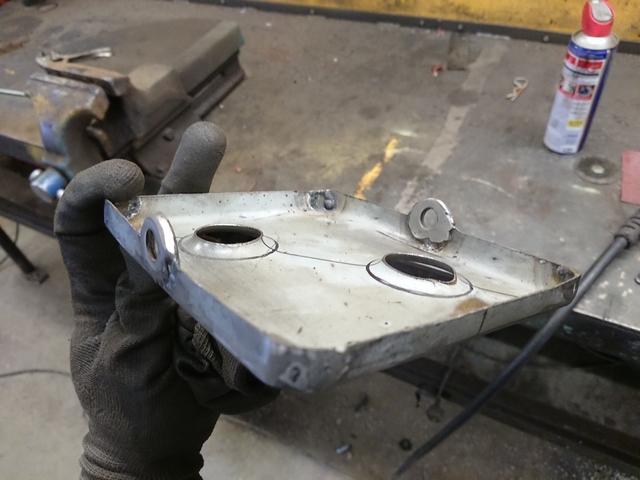
When I swapped out the front of the car, I already removed the battery platform from the donor front. A simple matter of drilling some spot welds and out it came, already cleaning up the enginebay a bit.
But now I had to create an entirely new place to strap the battery down. And it would move to the back of the car, but where should it go exactly?
This is first and foremost a hobby car, so it doesn't need to be super practical anymore. It's not like I'm going to use it to get our weekly groceries, or need to have enough room for lots of luggage for holidays.
So losing a bit of room in the boot of the car is something I have thought about and I'm perfectly fine to live with.
However...When I do find myself in need of hauling a few things with me, I still want to be able to do so. I'll still make every effort to conserve as much room in the boot as I can, and I want the new mounting to look as stock as possible. It should look like Toyota designed it that way and put it there in the factory all those years ago.
Looking in the boot of the car, there are spaces behind the wheel wells on each side that are large enough to accommodate a battery. So now I had to decide on which side I wanted the battery to live.
My initial thought was to put it on the right side of the car. This way, a bit of the weight would be distributed over the longitudinal axis of the car when I would be sitting in the drivers seat on the left side. This would only be marginal off course, but every bit helps.
But the jack for the car was also mounted on that side of the car and I wouldn't want to take out the battery whenever I would need to jack up the car. And with the wiring in mind, the left side of the car would make more sense. So I eventually decided the left side of the car would be the new mounting position for the battery.
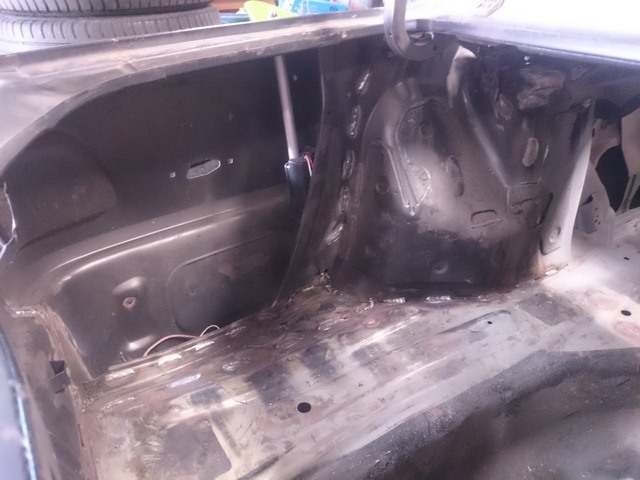
Where the new battery is going to live. In the void behind the wheel well in the boot of the car.
Now all I had to know was how big the battery I would use was going to be. Batteries come in all shapes and sizes, but I wanted one that was as narrow as possible while still be able to provide enough electrical power.
For safety reasons I wanted to go for a gel battery. It is now inside the cabin after all and in the ecent of an accident I wouldn't want a regular battery to burst open or something like that. That would have some nasty consequences...
After a little research, I decided that a Optima Yellowtop YT S 2.7 would probably be the best choice for my application. With its 237mm length, 129mm width and 201mm height, it's compact, safe to use in the cabin, is very suitable for season use, but should still be powerful enough to crank the engine from its remote location in the back.
Now that I knew the dimensions, I could fabricate a new battery tray of the right size. This would firstly help me to visualize how much room the battery would actually need and how much it would protrude into the boot.
I already measured it off course, but sometimes you just need to see something for real to get a good idea of the actual size.
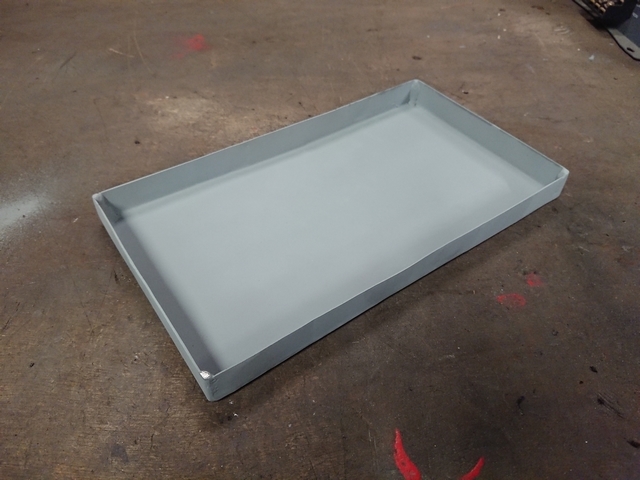
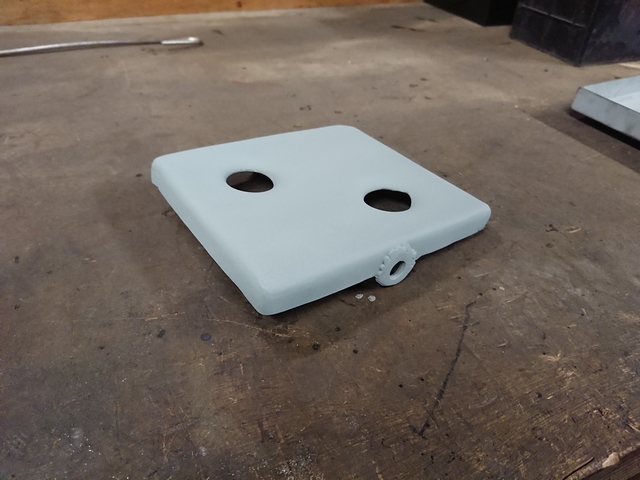
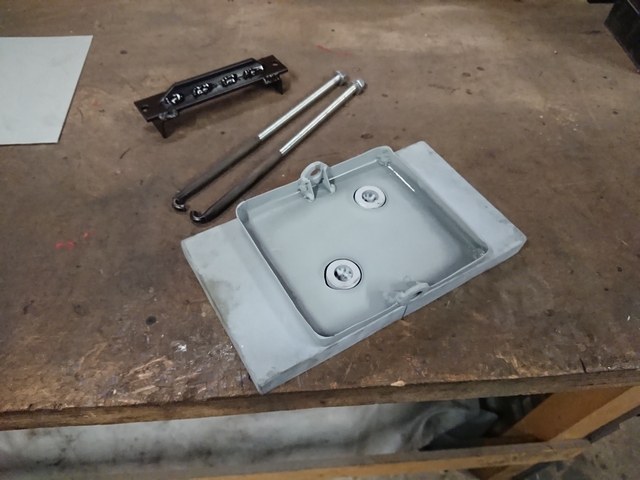
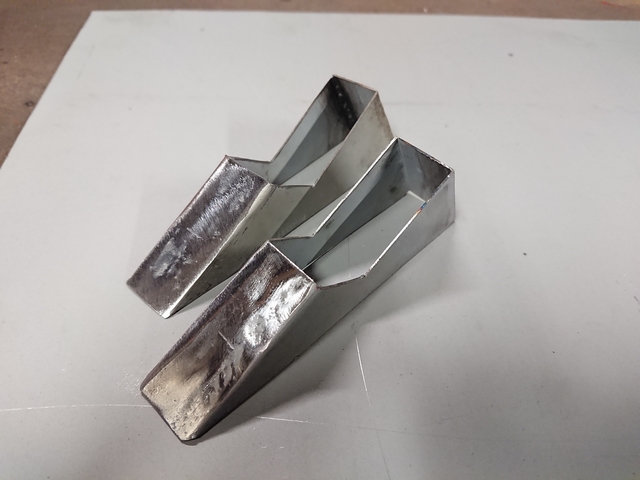
The new battery tray. It's made out of sheet metal and the Yellowtop should fit snugly in there.
Out of some 0.8mm thick sheet metal, I made a new battery tray. There already was a plastic one fitted to the car from the factory, but it didn't have the right size for the new battery.
With the new battery tray, I could see if the planned spot for the battery in the boot would work size wise.
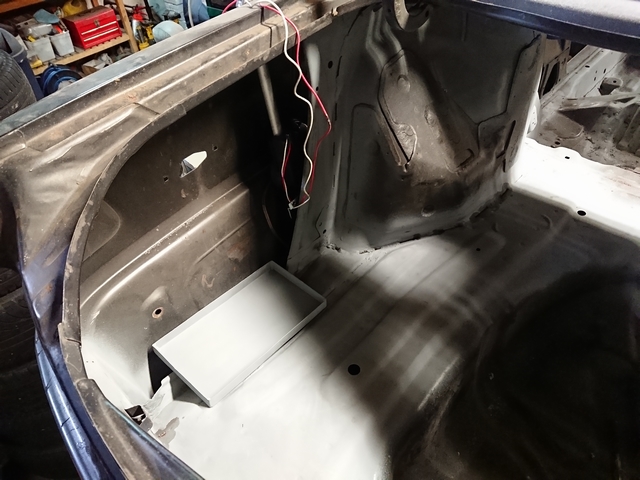
As can been seen in the picture above, that shouldn't be a problem. I had more than enough room to spare length and height wise and the width wasn't all that bad either. You can see it takes about the same space as the wheel well.
Now on to making sure I could safely and securely mount the battery in its new location.
Other might have just drilled a few holes in the bottom of the car and just bolted the battery down and be done with it. But that's not how I roll...
I'd like it to look as if Toyota themselves designed it that way and put the battery mounting back there.
So I took the way the battery was mounted up front as my starting point and tried to adapt that to the rear.
In the engine compartment, the battery sat on a sort of 'platform' on which the battery tray gave it a but more support and was held down with a small bar bolted down to the chassis of the car.
So I would need a new 'platform' for the rear of the car to which I could bolt it all down to. That platform would have to be welded to the car and should be strong enough not to distort or crumple like a tin can and hold the heavy battery in place might I ever, god forbid, find myself in some sort of accident.
I made the platform out of the same 0,8mm metal sheet I used before. Now in itself, this isn't very strong. But there are ways to make it a little more rigid so it would do the job.
To form the metal this way, I made a wooden template on which I could hammer the metal into the desired shape.
The wooden template already has 2 holes drilled into it, this should help me make two flared holes in the platform. These should help considerably with making the platform stronger and more rigid and they will help position the new battery tray as you will see later on.
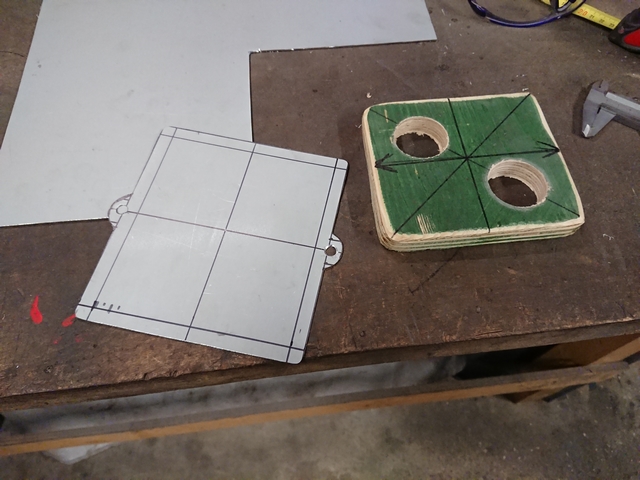
As can been seen in the picture above, I also accounted for two mounting points for the rods that will hold down the battery.
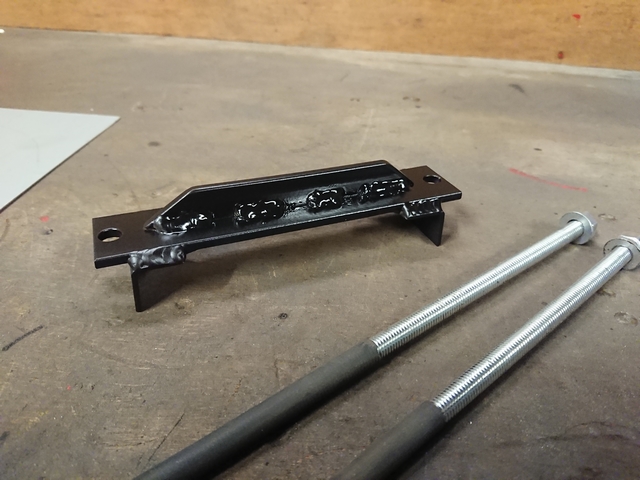
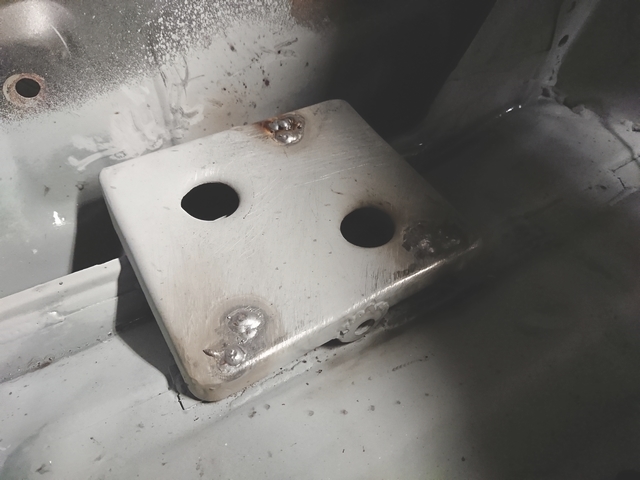
And after a bit of hammering, bending, welding and grinding, you end up with something like this:
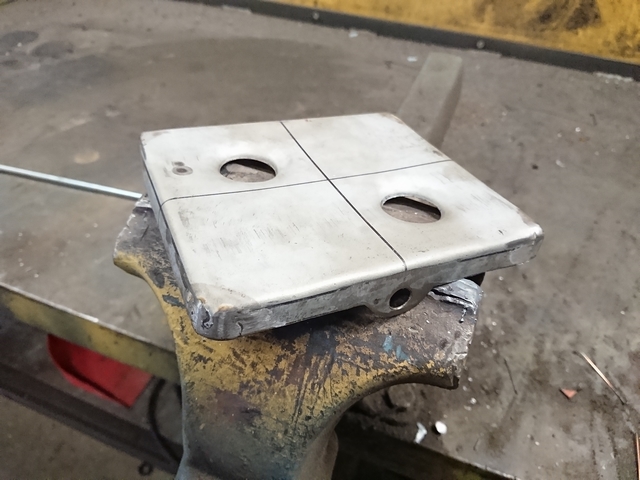
In the picture above, you can see that I doubled up on the mounting points by welding a few rings on as well to provide a little more flesh for the rods to hook into.
And a little does wonders for the looks of the piece.
And after that, I even added a bit more bracing on the under side. After test fitting everything, it turned out that I was still able to bend out the mounting points when bolting down the battery.
With these added braces, that shouldn't happen anymore.
Meanwhile, I also fabricated all the materials to fasten down the battery with. The two hold down bars are just two threaded M12 threaded bars of which I machined down the threads from the last 15mm and bend the into a little hook that would catch under the battery platform. I removed the threads there so it wont damage or start to cut into the material of the platform while driving
I finished the lower ends with heat shrink for a little more durability and a nicer finish.
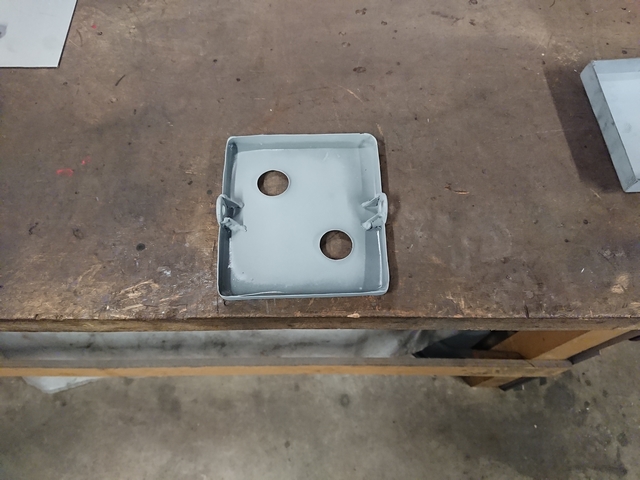
As I said earlier, the flared holes would also help position the battery tray. The original plastic battery tray had some raised circles underneath that fell into the recesses in the platform. So I copied that idea and cut two pieces of pipe with the right diameter, and welded those to the underside of the tray.
This way, the tray can't slide around on the platform to much and helps keep the battery firmly in place.
Now the platform had to be welded to the car itself. This was going to be my biggest challenge, as that part of the car doesn't have a single straight piece of bodywork that I could use to reference from.
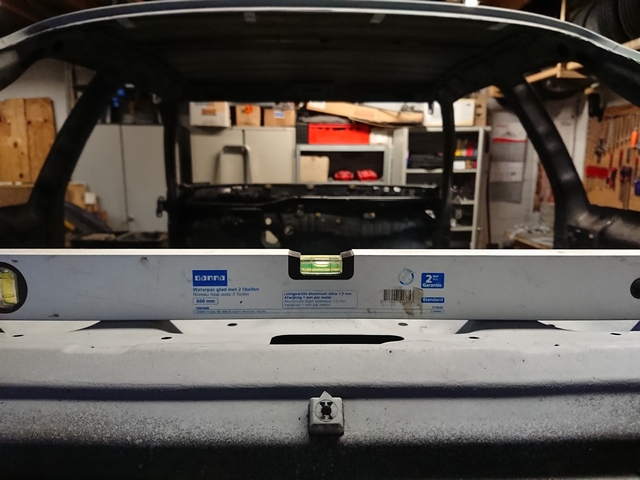
But I can also create at least one reference, by making sure the entire car is hanging dead level in the rotisserie.
This way, I can always reference my new platform in the horizontal position.
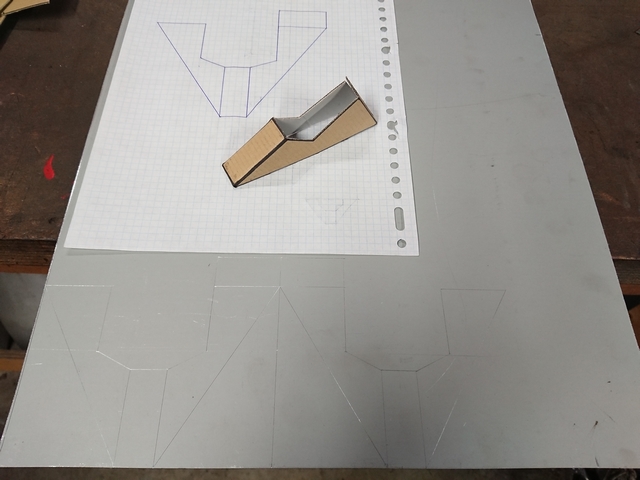
After that, I made a lot of measurements to what would be the best way to weld the platform to the car. I planned on making some brackets I would weld to the car first and weld the platform to those later. Initially I wanted to fabricate the bracket in one piece, but that turned out the be to complex to get right. So I opted for several independent brackets that would make it a lot easier for me to get the platform level in the car. I used cardboard templates to see if everything would fit as I intended it to.
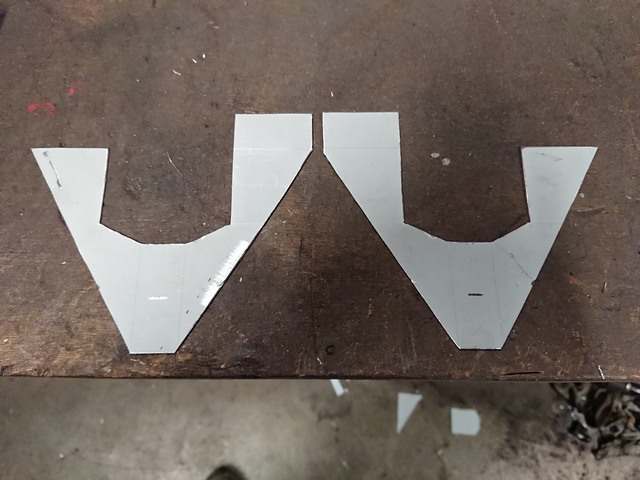
When I got the shape just right, I transferred the design to the sheet metal, cut, bend and welded it into shape.
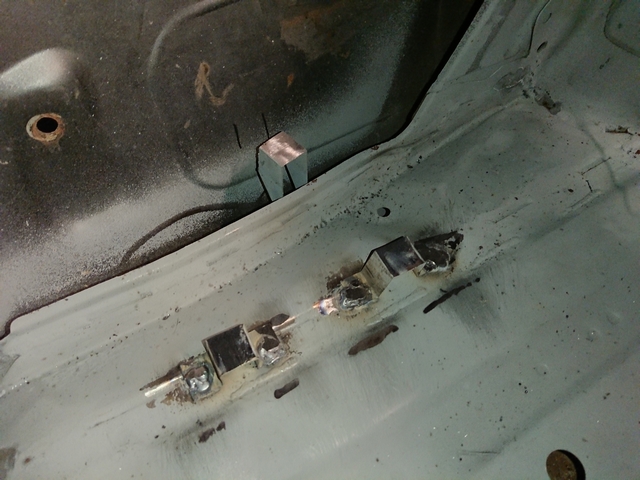
These brackets could now be welded to the car. But space in that part of the bodywork is so tight that I didn't have enough space to get my welding torch in there. So I turned the car over in the rotisserie, drilled a few holes on the outside of the car where the brackets would sit on the inside.
I used a magnet to keep the brackets in place inside the car, so I could plug weld them from the outside of the car.
The holes I drilled on the outside of the car. You can already see the bracket in place on the other side,
held in place with a magnet.
I did make two brackets, but because of the shape of the panel I had to weld them to, it was more practical to use only one. With three brackets, the platform will still be very stable.
After this bracket, I had to make two more to weld to the bottom of the boot. The floor isn't a straight piece and to have the platform level, the two brackets were of different heights.
I used the same plug weld technique to weld the brackets to the floor and the platform in turn to the brackets.
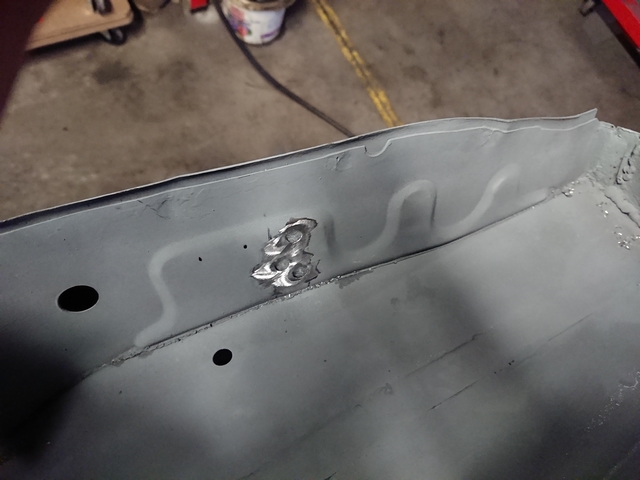
When I measured and marked out where the brackets would be positioned under the platform, I drilled a few holes in the platform so I could plug weld them to each other.
But before I welded the platform to the brackets, I gave everything a shot of zinkc spray because I wouldn't be able to get there anymore after the platform was in place.
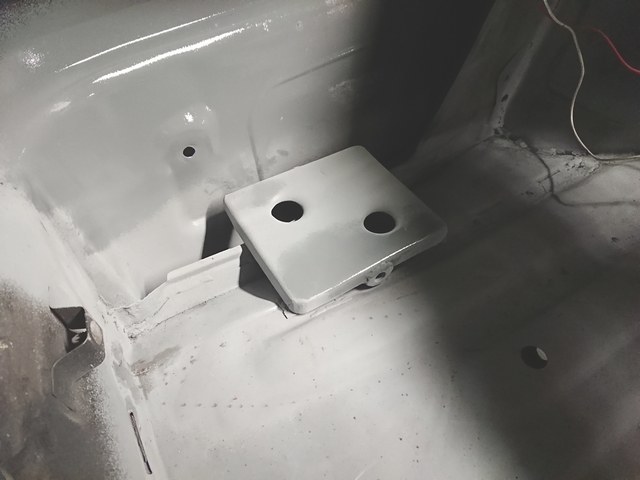
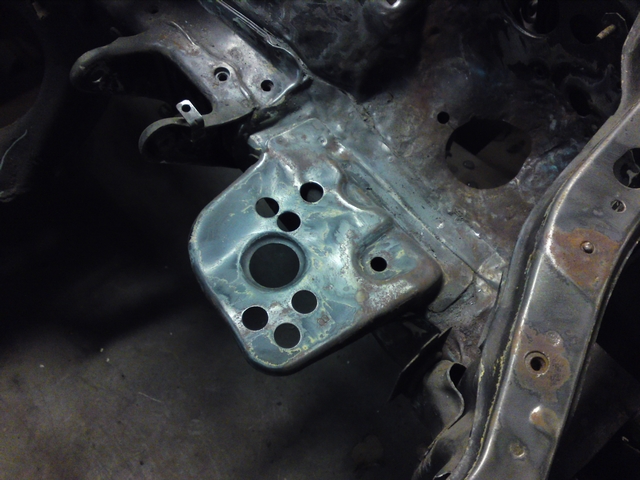
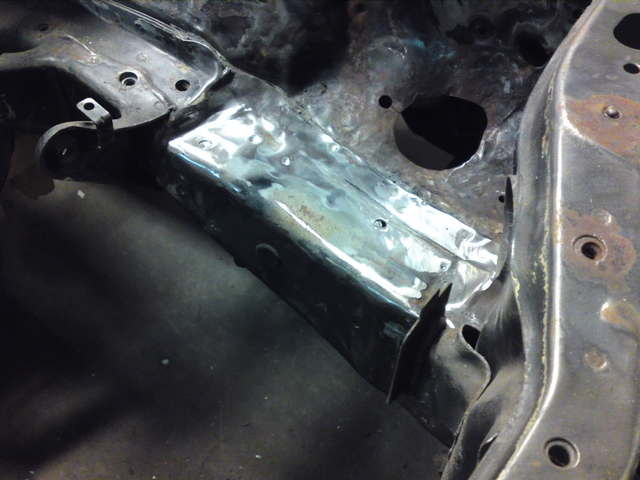
The battery platform welded to the car. After the plugwelding, I ground back the welds
for a nice flat surface which I coated with some zincspray.
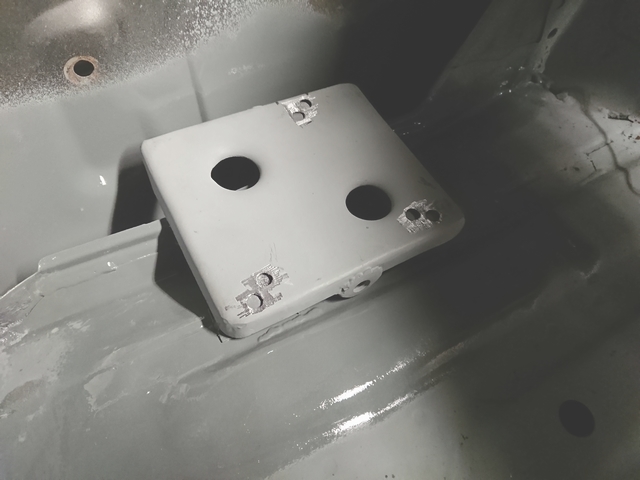
I had a battery lying around in the workshop which was very similar in size to the Yellowtop I was planning to use. I used that to test fit everything to see if the battery relocation worked out the way I wanted.
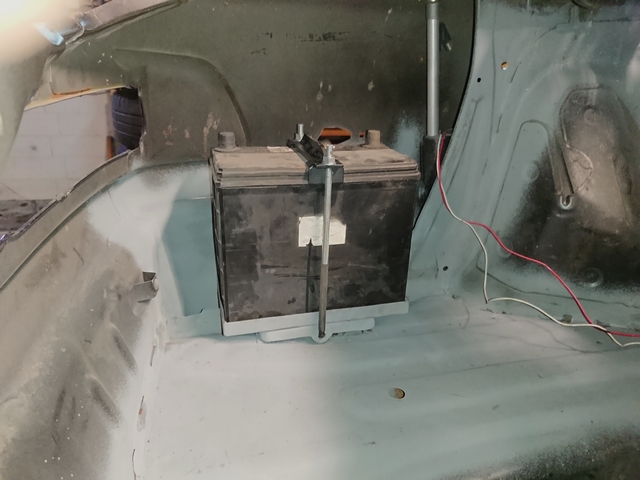

And luckily for me, it did! The battery fits snugly into place and can easily be bolted down to the platform.
To see how sturdy the new platform was, I even rotated the car on its side and upside down. Keep in mind that that battery weighs a good 12 to 15 kg's and it didn't even flinch.
So all in all, I'm pretty happy with how the battery relocation worked out.
The battery can sturdy and safely be placed in the boot od the car and if you ask me, it has a pretty stock look to it. If you didn't know any better, you might just think that Toyota intended it to be like this.
The wiring will be done later on when I get to that stage of the build. But it shouldn't be to much of a problem, as there is plenty on room around the battery to get the thick battery cables from the battery to the front of the car.
Next up is modifying the boot upholstery to get the battery covered up and out of sight. I'll make a little hatch in that panel so I have easy access to the battery if I need to get to it.
You'll read more about that on the appropriate page in the interior section of the website.