Installing KONI shock inserts
When you want to replace the shocks, there is a lot to choose from. A lot of companies have made shocks for these cars. But I chose KONI yellow shocks. Partly because my Corolla hatchback already had a set of KONI red shocks installed and I really liked those.
On the other hand because the dampers can easily be adjusted, and because everyone that has used them was very positive about them. KONI has a very good reputation and the quality of their product is way up there.
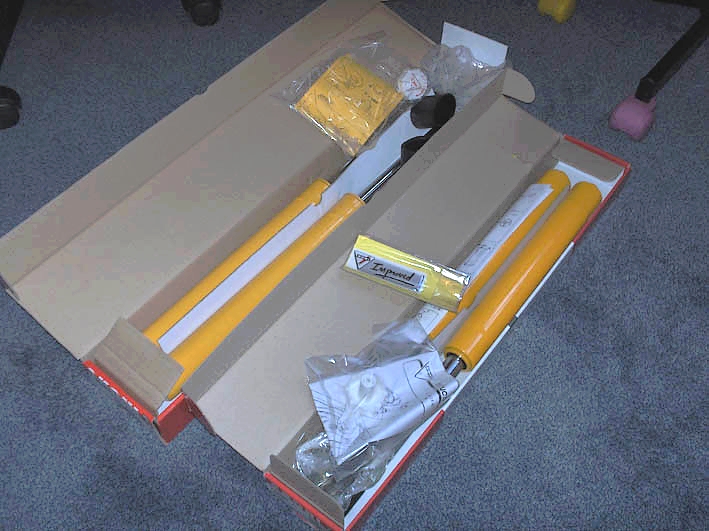
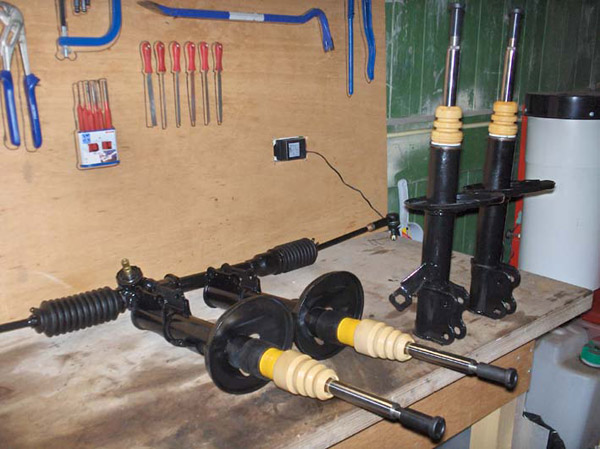
The shocks for both front and back.
KONI has produced shock absorbers for practically all E9 Corolla models. So look at what type you need for you particular car.
For the GTi/GT-S models you will need the following KONI sets:
KONI yellow shock absorber insert front: 8641-1146
KONI yellow shock absorber insert rear: 8641-1147sport
The shock absorber inserts need to be installed in the housing of the original shocks and these have to be modified to be able to accept the new inserts. It's important that the original shocks are still with the car. If they have ever been swapped out for aftermarket shock absorbers, the KONI's might not fit.
Where other manufacturers give you complete new struts that can bolted under the car, KONI gives you instructions on how to modify the original struts to accept their inserts.
The original front shocks already contained inserts that were held in place by a big nut on top of the shocks. So that was just a matter of unscrewing the top nut, take the old cartridge out and place the new KONI cartridge. KONI supplies a new top nut with it's shocks so I used those to close the shocks again.
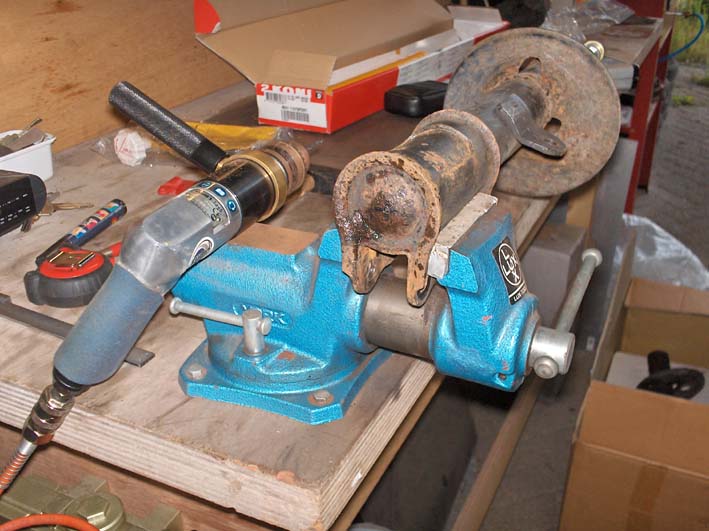
But with the rear shock absorbers, a bit more work was involved to get the old shocks ready to accept the KONI inserts.
First you have to release the pressure in the shock by drilling a small hole in the bottom of the shock.
Now you need to use the KONI manual to work out where you need to cut the top half of the shock. In my case, this was 40mm measured from the top of the shock.
When the top is cut off, you can easily pull out the cartridge that was in there and drain the original shock from fluids that are still in there.
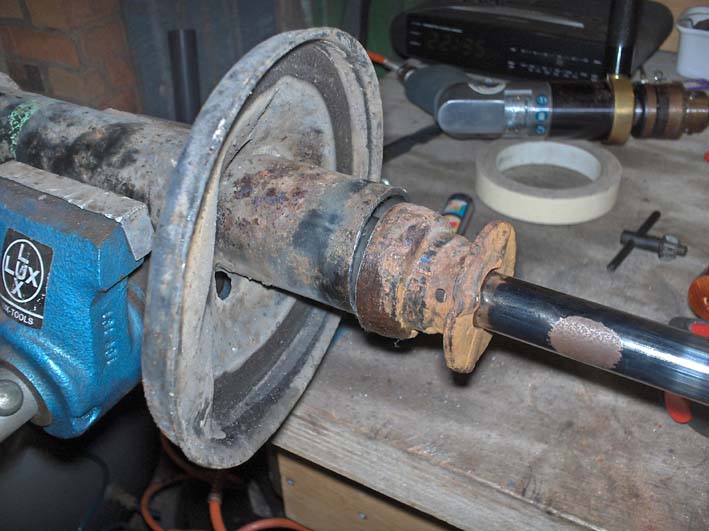
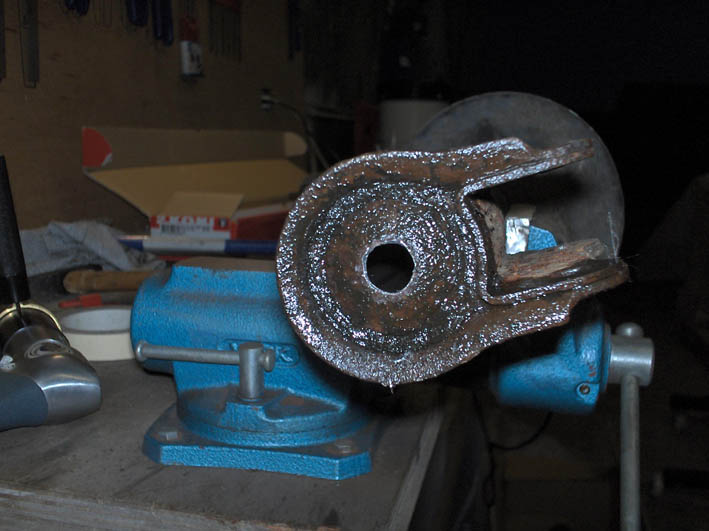
One of the rear shocks with the drain hole, the top cut off, ready to receive the new
insert and with the larger hole for the bottom bolt.
The hole I already drilled in the bottom of the shock now needed to be drilled to a bitter diameter now to accommodate the bolt securing the insert in place.
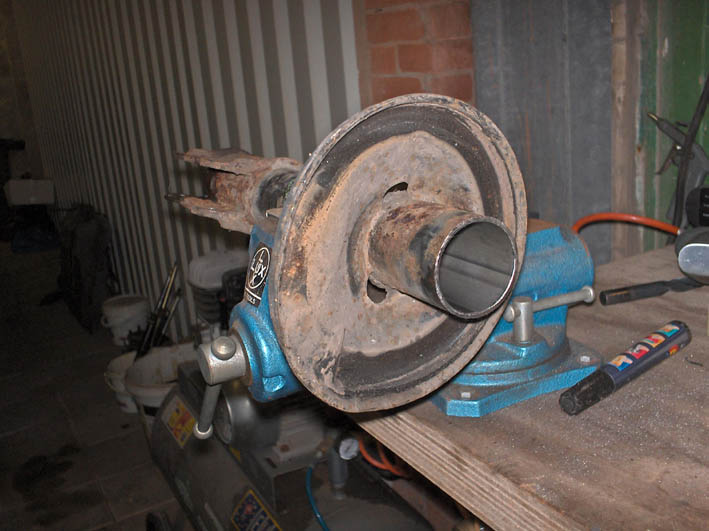
When I had the rest of the shock absorber housings ready I send them off with the rest of the suspension to have them sandblasted and powder coated.
I got them back after a few weeks and now the KONI cartridges could be permanently installed.
Before the new top nut KONI supplied could finally be screwed on, the shocks needed to be filled with anti-freeze to make sure moisture can't fill the shock and freeze in there what might cause the shock to crack open.
The KONI manual states how much anti-freeze should be poured in there.
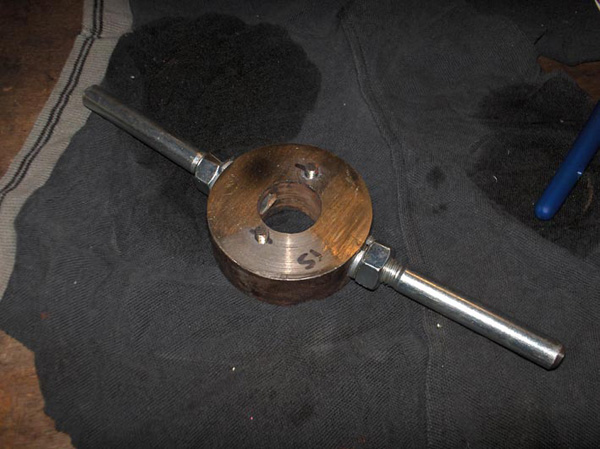
That top nut that had to be screwed on didn't have a hexane shape, but had two holes to fasten it with a special tool. I didn't have that tool, so I just made one from a few pieces of scrap metal.
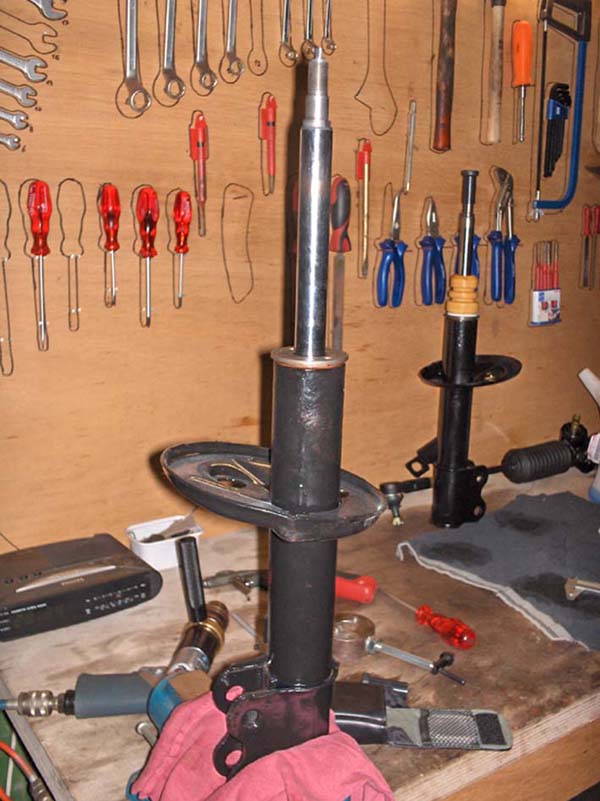
The front shocks were now all done and could be fitted with new springs, bumpstops etc. before being installed back under the car.
The inserts for the rear shocks could now just slide in and be bolted down by the bolt that is supplied by KONI in the package. The top of the shocks are sealed of with a rubber boot
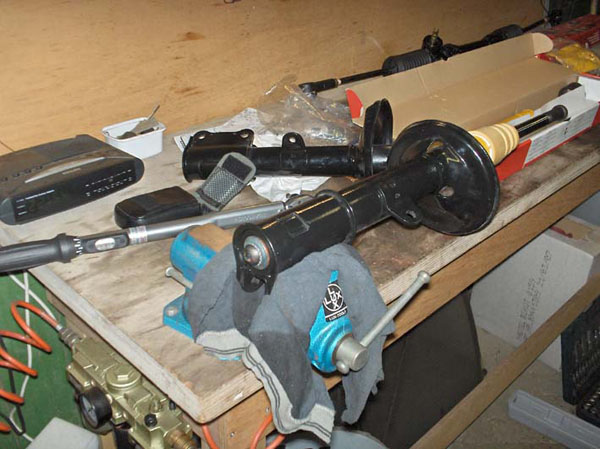

And eventually all 4 shocks were done and ready to be installed under the car again.
I didn't install the shocks under the car right away. The body of the car wasn't even near finished so I laid the shocks away in storage until the time would come to install them. But being stored in my old workshop, near the salty North Sea didn't do them any good.
I only saw this when I pulled the shocks from their boxes when I was moving to the new workshop.
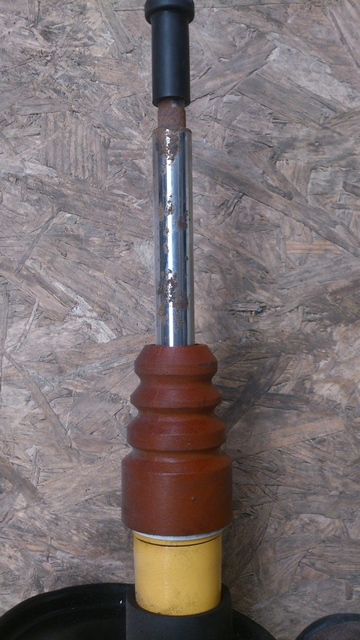
Rust had started to eat at the chrome outer layer of the rods and that was bad news. Like this, I couldn't use the shocks anymore. A real bummer, but it happened and nothing I could do about it anymore.
Only thing left for me to do is to buy new KONI shock absorbers and repeat the whole process on this page again.
So if you ever need to store a set of shock absorbers because you can't use them right away. Take care to store them in a dry place and protect them, because you might end up having to replace them otherwise.